Editing your Knoetic fields and filters
![]() Updated
Updated
Managing Your Data Fields Across Knoetic
Only users with Admin privileges have access to field management settings.
This article outlines:
- Default fields that are included upon initial implementation
- How to and edit your data fields
- How to set values as default filters on your Dashboard
Default Fields
Default HRIS & ATS fields: During your initial implementation, a short list of HRIS fields from your system will be added. Those include fields related to basic employee, job, compensation, and termination data. From there, you will be able to manage the data fields that are pulled in.
Default Knoetic Calculated Fields: During your initial implementation, we include a number of calculated fields that are formulated based on the data we've derived from your underlying source. These include, but are not limited to: # Direct & Indirect Reports, Time Since Last Role / Position Change, Attrition Risk... and more! These fields can be removed, edited, or renamed at any time.
Where do I manage my fields?
Changes made will be automatically reflected across all available filters and field & chart values.
You can review and manage your fields on our Settings page, which is found within the top right-hand menu dropdown. Click on the arrow next to your name and click "Manage Filters".
Once there, you will see a searchable list of the fields that are currently active in Knoetic. A few notes:
- Order = the order of your fields that will be represented across the platform
- Title = field name in and across Knoetic
- Key = our source key identification
- Source System = the underlying system that houses the original data set
- Actions = a tool that allows you to review values, change the Title, and remove field
Adding New Fields
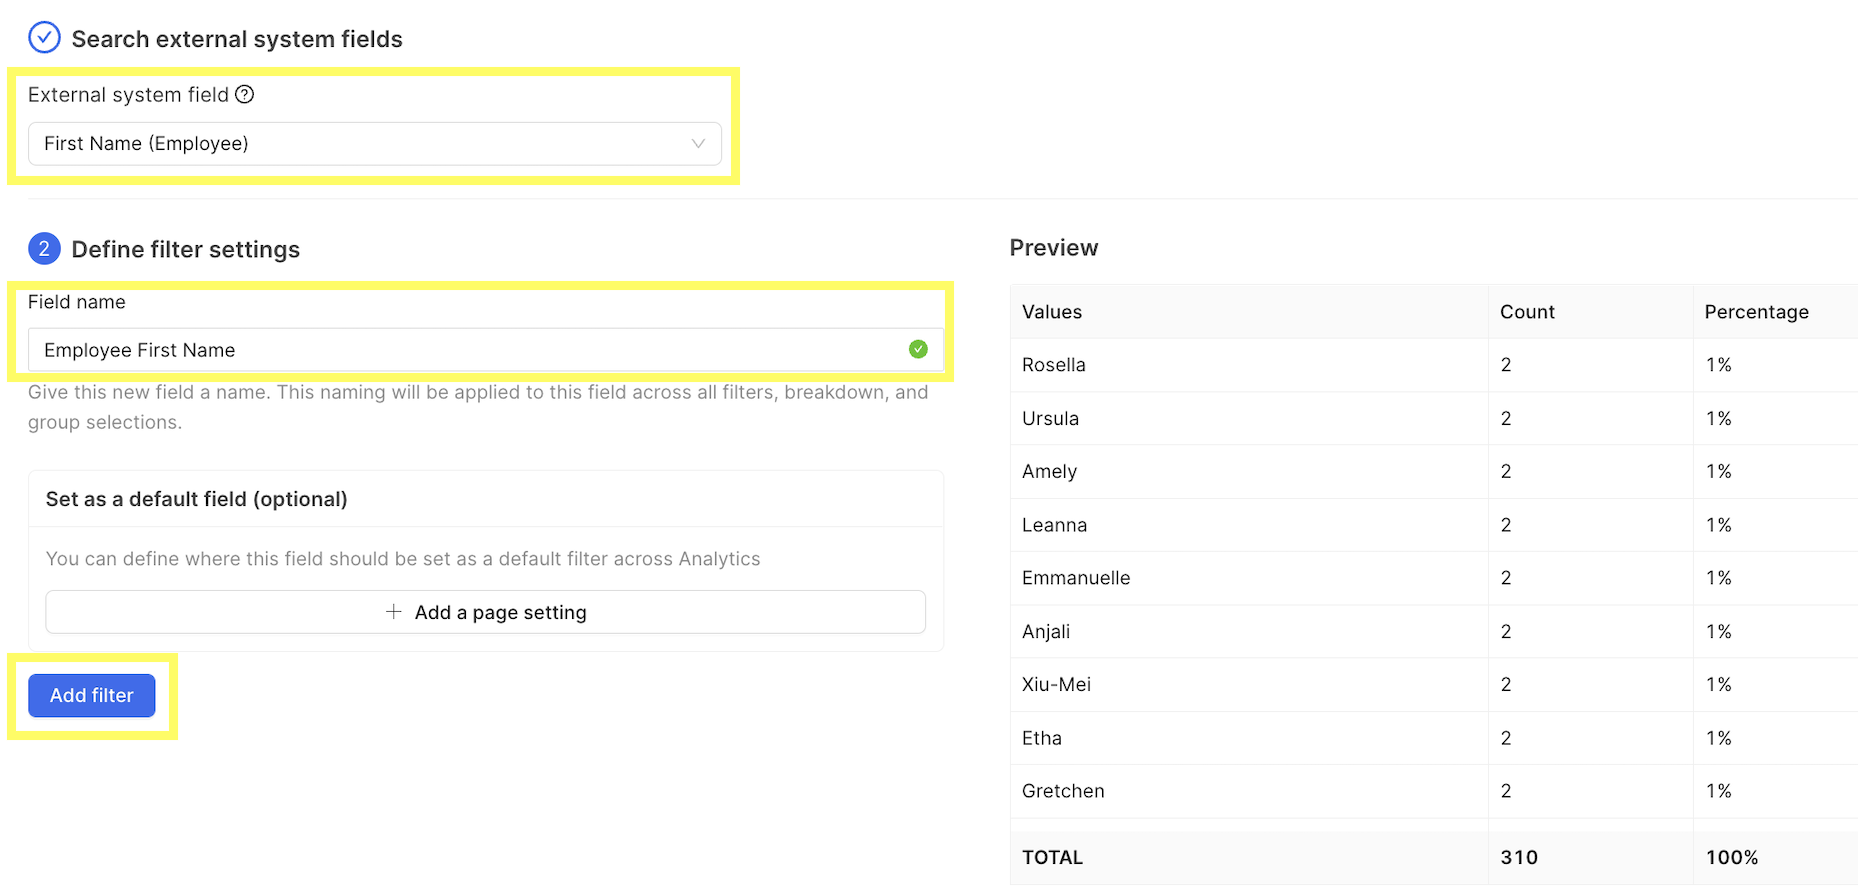
To add a new field in your Filter Settings, follow these instructions:
- Click the blue "+Add Filter" button
- Search and select a field from the "External System Field" search bar. This includes the library of fields that we are receiving from your underlying systems
- You'll be provided with a preview to review the associated values
- Create a Title for your field under "Field Name"
- Add a "Page Setting", if needed, to designate a default filter across any of your Dashboard tiles
- For example, your can set a default filter for Employment Type = Full-Time across your Dashboard tiles
- Click "Add Filter"
Can't find a specific field?
The search bar pulls field code names instead of your naming convention. Check your active filters to ensure that it has not already been added.
Editing & Disabling Fields
To add a new field in your Filter Settings, follow these instructions:
- Search for the field you'd like to edit and click the "Edit" button under Actions
- Here, you can edit the Field Name and/or the Default Filters for your Dashboard tiles
- If editing the field, click "Save changes"
- To remove a field, click "Disable Filter" which will remove it entirely from the platform
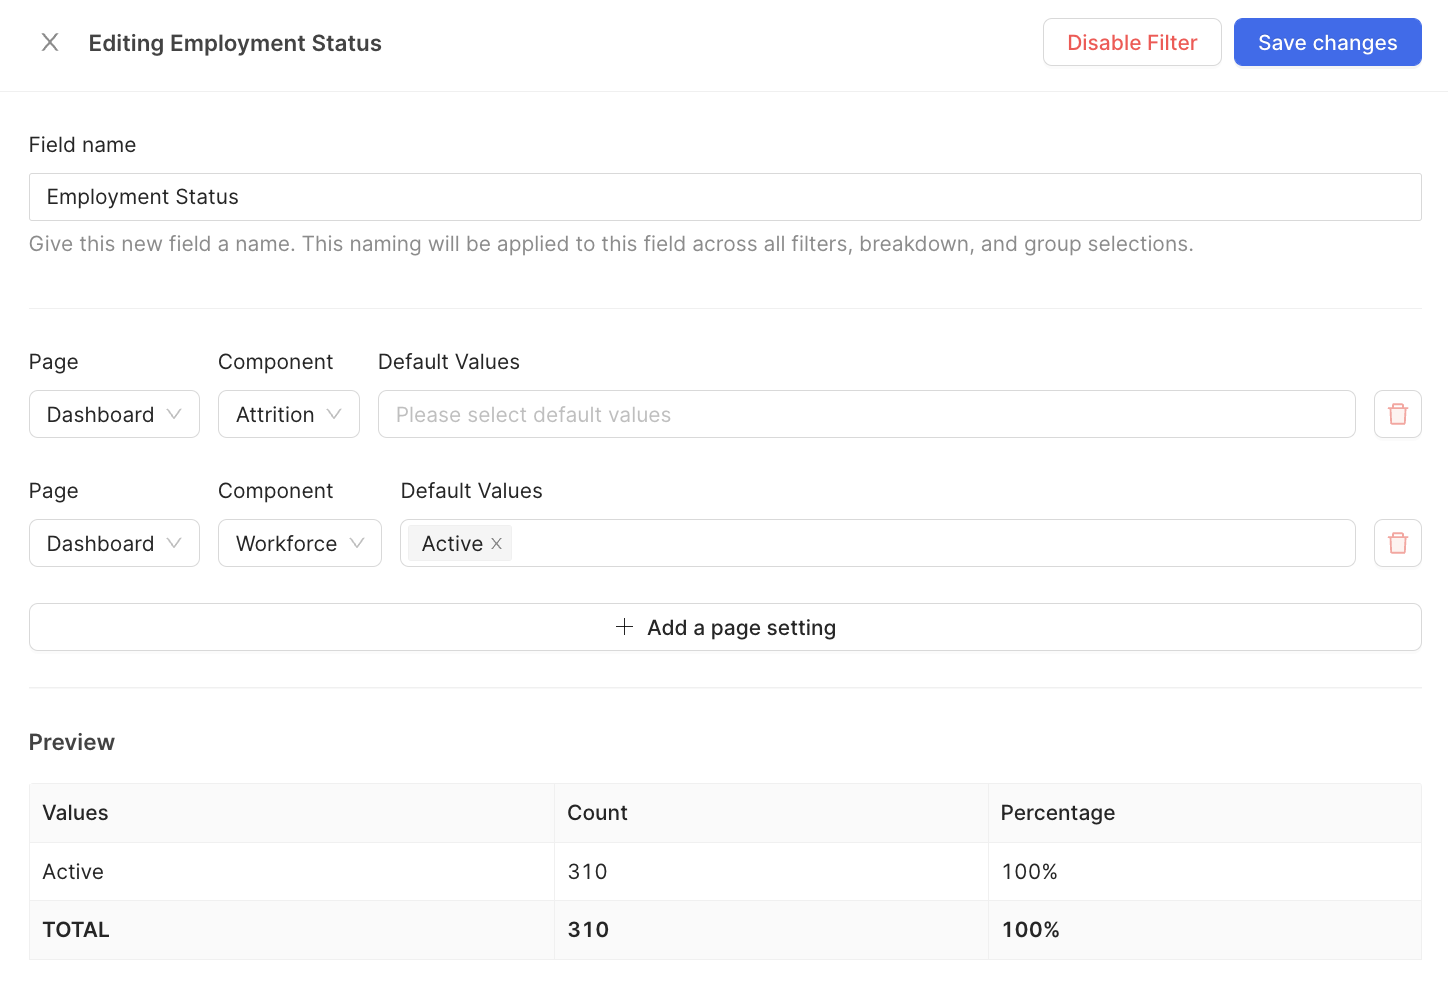
Setting Default Dashboard Filters
This tool allows you to set default filters on your Dashboard tiles for views that you look at regularly. For instance, you can set a default filter to always and only show "Full-Time Employees" across your tiles.
- In your Filter Settings, find the field and click "Edit"
- Add a page setting and the associated Component (or Dashboard Tile)
- Add the values from that field that you would like to set on each specific tile
- Click "Save Changes" when you're done!
In the example below, we set the "Voluntary" value under our Termination Type field to always appear on the Dashboard's Attrition tile.

Need help?
Email success@knoetic.com with questions or for additional assistance.