Grant user access, safely—from HR to executives to leaders—with our user permission settings.
To become more data-driven, you need data. However, it's important to ensure that data is shared safely and appropriately for a number of reasons. Our user permission settings allow you to restrict data based on your specific user needs.
This article will outline:
How user permissions work in Knoetic
How to create a Permission Group
How to create a new user
How to edit an existing user's access
How to remove an existing user's account
User Permissions Overview
There are two important layers in our user permissions settings:
Access Level ("The Who")
Based on hierarchy within the organization. There are four tiers within Access Level:
Full: This user can see all employee data with no restrictions
Restricted (Self): This user can see their own direct and indirect reports. Ideal for business leaders who oversee specific functions.
Restricted (Custom): This user can see the direct and indirect reports of a leader or leaders. Ideal for HRBPs and People Partners who assist with specific leader's teams.
Further restrictions to a user's access levels allow you to either block or display any standard or custom data field. If a field is restricted, it will not appear as a field, filter, or value option for the restricted user.
For example: I want to give my Engineering Director access to their team's data but hide Gender & Ethnicity field values.
Creating a Permission Group
Create permission groups with field-level restrictions for increased control over the types of data that certain team members have access to in their Knoetic view.
Below are the steps for creating a new Permission Group.
Note: Only designated Admins can create new user accounts. You can see who your admins are in yourUser Settings.
Visit Settings and navigate to the "Permission groups" tab.
In the “Permission groups” tab, click on the blue “+ Create group” button in the top right corner to open the settings for adding a new permission group.
Follow the instruction prompts outlined on the screen that appears: 1) Name this group. Give the permission group a name. 2) Add group members. Add users to the group who you would like to have the defined permissions/restrictions. Note that you can continue adding users to the group after creating it (found under the “Permission groups” tab). You can only add current Knoetic users to permission groups. 3) Define data permissions. Select the data fields that you would like to be allowed vs. hidden for this particular permission group. All fields are under the “hidden” side by default. A “hidden” field is one that the selected users will not see as a field, filter, or value option throughout Knoetic.
For an added measure of security, preview and review the permissions before creating the group.
Creating a New User
Below are the steps for creating and adding a new user to your Knoetic account. You can designate access level and field-level restrictions for each new user.
Note: Only designated Admins can create new user accounts. You can see who your admins are in yourUser Settings.
In the "Users" tab, click the blue "+ Add User" button to open the settings for creating a new user.
Follow the instruction prompts outlined on the screen that appears: 1) Select an employee. Search for and select an existing employee from your HRIS system, or manually invite the new user by entering their name and email address. Click "Continue."2)What data fields can they view? Define the new user's access to data fields. Select "Full data access" to give the user full access to all data fields or "Custom data access" to add the user to a permission group with field-level restrictions. Note: To add a user to a permission group, you must first create a group (see "Creating a Permission Group" above for details!).
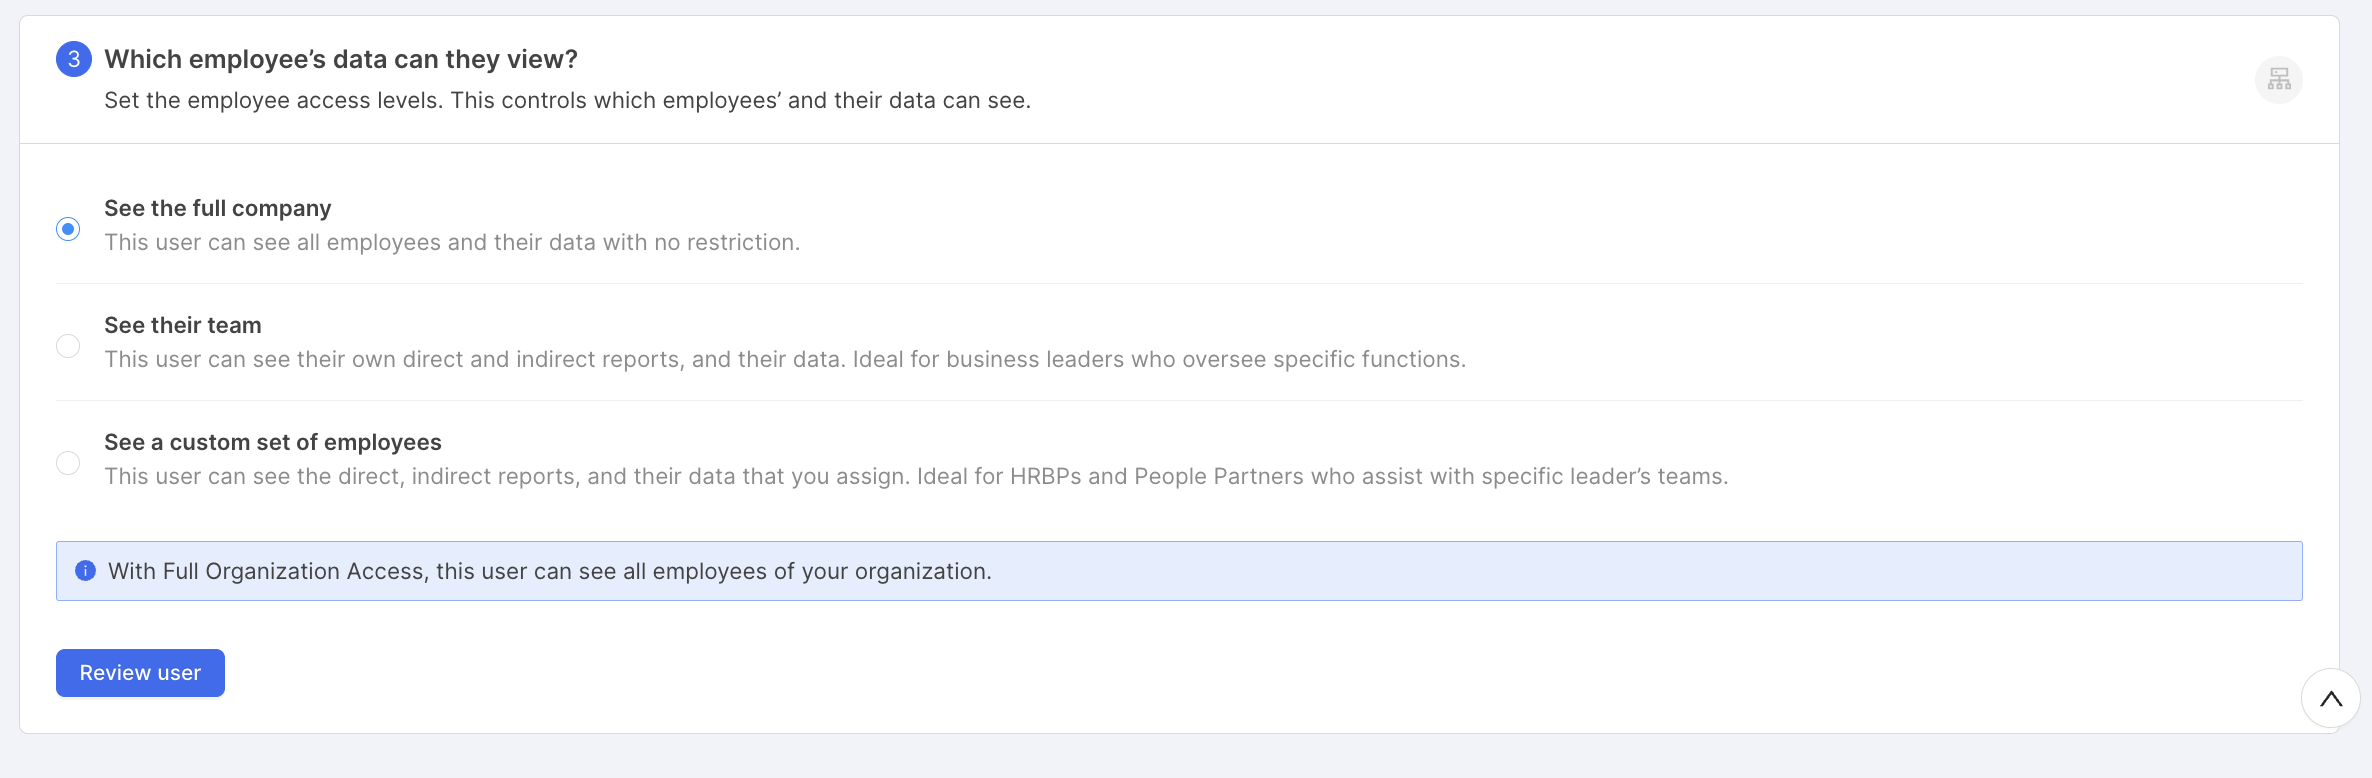
3) Which employee’s data can they view? Define the new user's access level to certain employee data, for instance:
Select "See the full company" to give the user access to all employees' data.
Select "See their team" to give the user access to only their own direct and indirect reports' data.
Select "See a custom set of employees" to give the user access to data of only the employees that you select.
For an added measure of security, click "Review user" to review and confirm the new user's access level and data field permissions before creating the new user.
Click "Confirm User," and the new user will be sent an email invitation to sign up for Knoetic. You can track their invitation status in the "Users" tab.
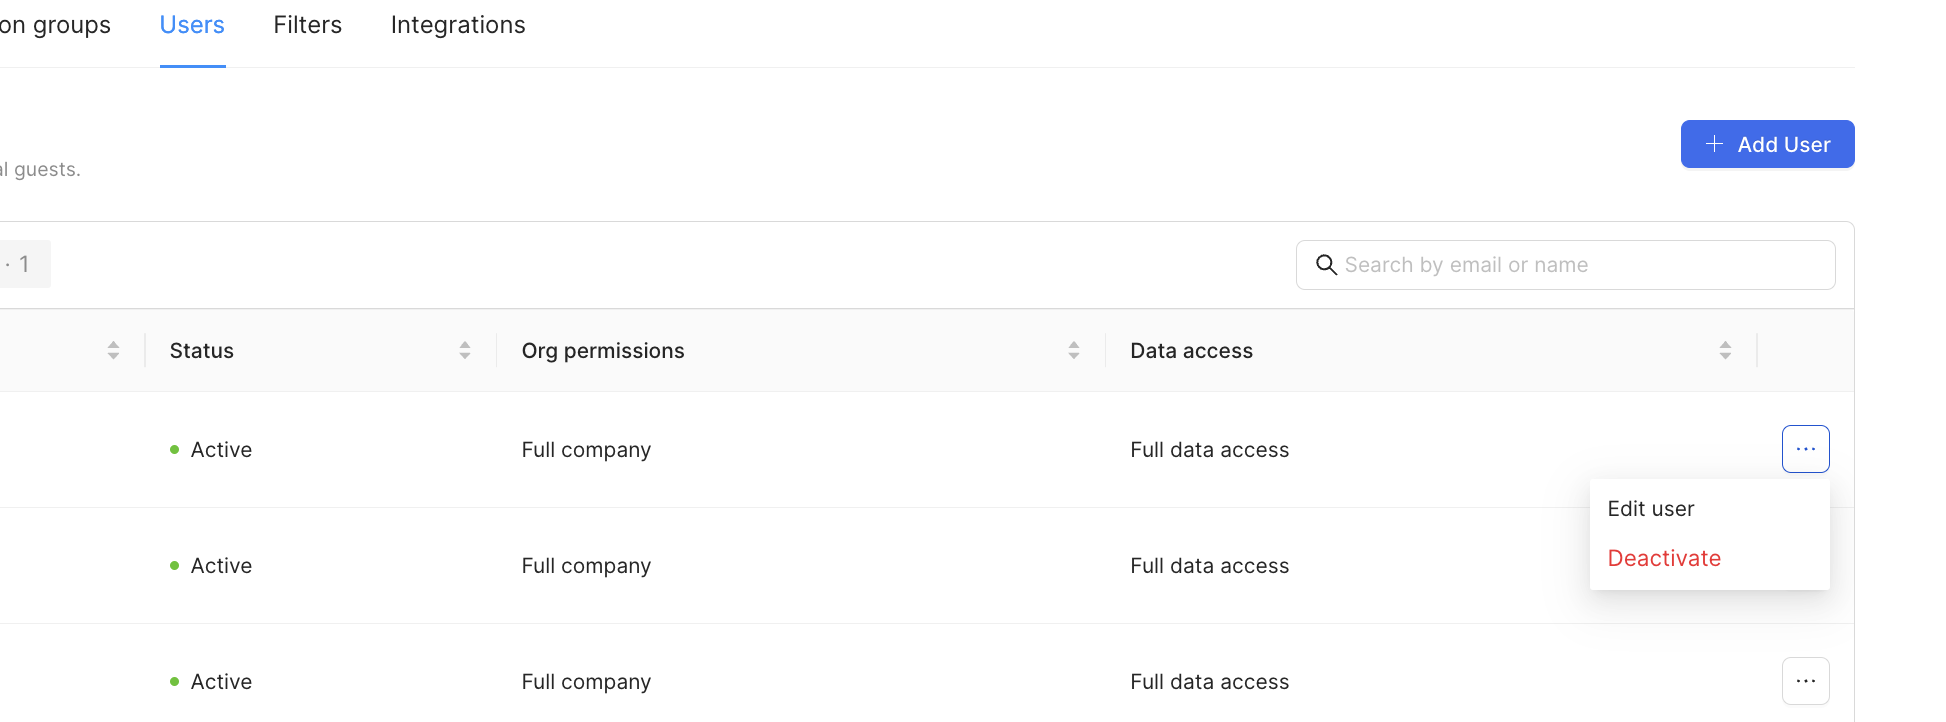
Editing an Existing User
Below are steps for editing details, data field permissions, and access level for an existing user.
Note: Only designated Admins can edit existing user accounts. You can see who your admins are in yourUser Settings.