Save and share a report
![]() Updated
Updated
Share a view-only report safely with members of your organization—and control what they can and cannot see.
For instance, give your recruiting team access to a DEI report without granting full access to Knoetic so they won't see sensitive information, like compensation.
Feature details & pro-tips
- Guest viewers must have the same email domain and cannot have full access to Knoetic.
- Guests can only view reports with read-only access and will not be able to edit criteria for the reports setup.
- Guests will have restricted access, specifically when it comes to sensitive information. They will only be able to see the reports shared with them and will not have access into Knoetic Analytics.
- Updates are made in real-time, so when a Knoetic admin (or "owner") edits the report, the viewer will see those changes when they refresh the page or log in next.
Who can share reports?
This feature is automatically enabled for CPOs and primary users.
To enable this feature for other members of your team, your CPO or primary users can email success@knoetic.com to request for us to enable this for another user who has full Knoetic access.
Keep in mind:
- Only users with full access to Knoetic can share reports, and
- Reports can be shared to any member of your organization as long as their email domain matches yours!
How to share a report
Guests viewers are required to create a Knoetic account for security reasons. Once a user has been shared on at least one report, you can send the "Preview Report" or saved report link for direct access.
To share an existing report, open your report from the Saved Reports folder in the left-hand menu.
To create and share a new report, open the Attrition, Explorer, Employee List, or DEI Analytics pages to begin adding filters and breakdowns to complete your report.
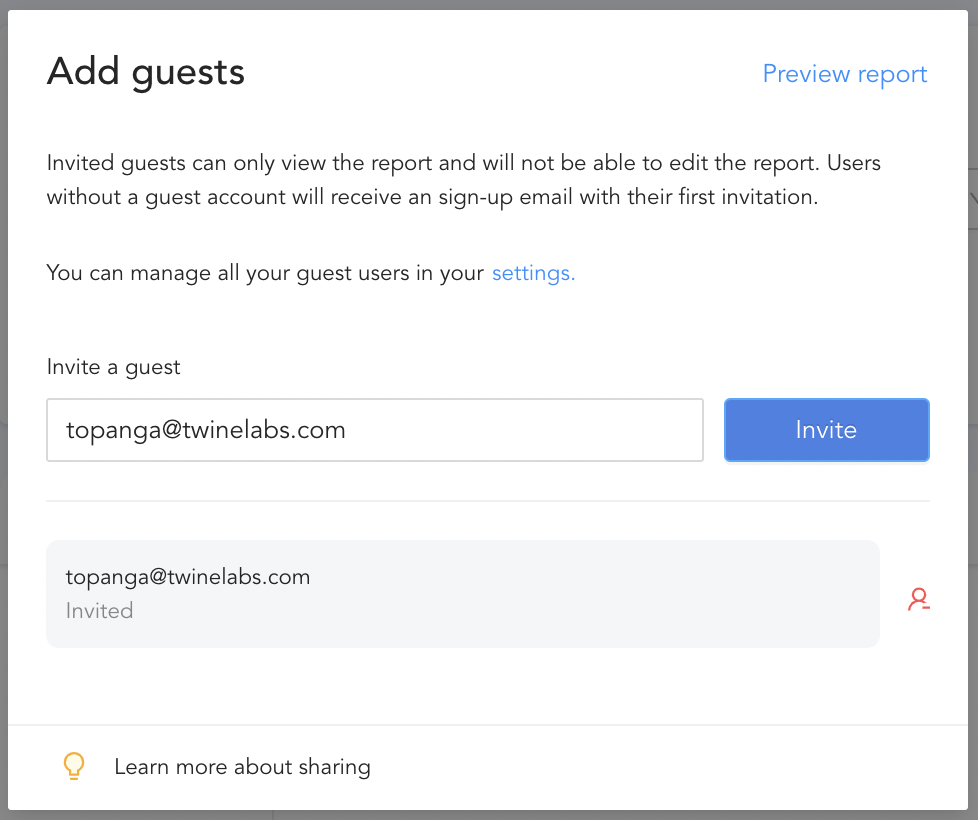
- When ready, click "Share". If you are sharing a new report, you will be prompted to name and save it first.
- Follow the prompts to add guests by simply adding their email address and clicking "Invite". Your guest will be notified via email.
- You may click "Preview report" to see what your report will look like to your guests.
Previewing a Guest user's report view
Before you send your report, you can click the "Preview Report" link to see what it will look like to your guests. Guests will see all details on the report page that was shared.
Guest user experience
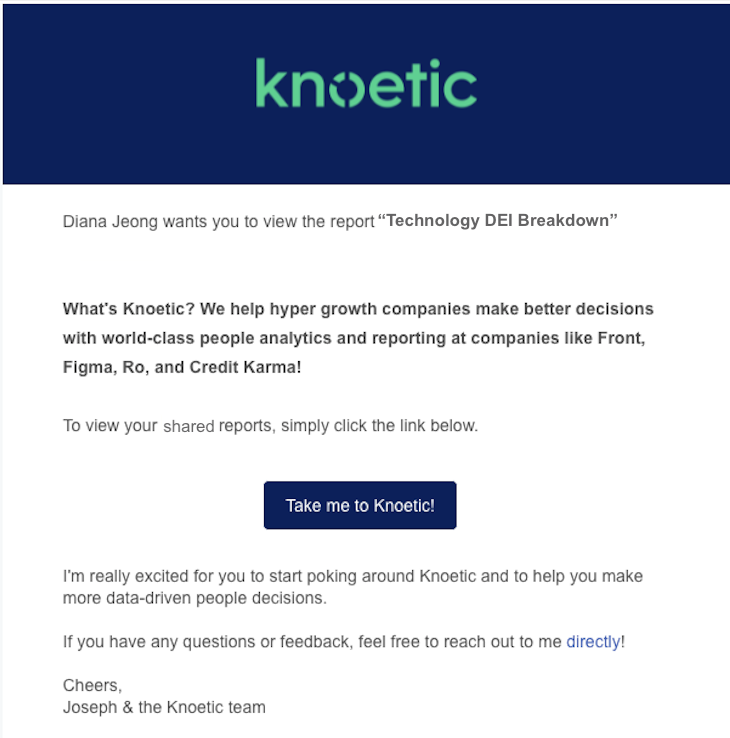
Below is the email that your guest will see when they are invited to view the report. Their initial invitation will be sent out via email.
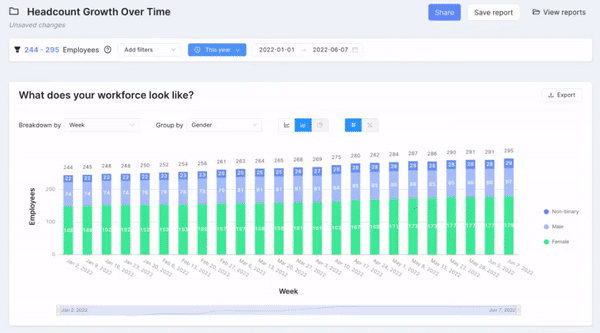
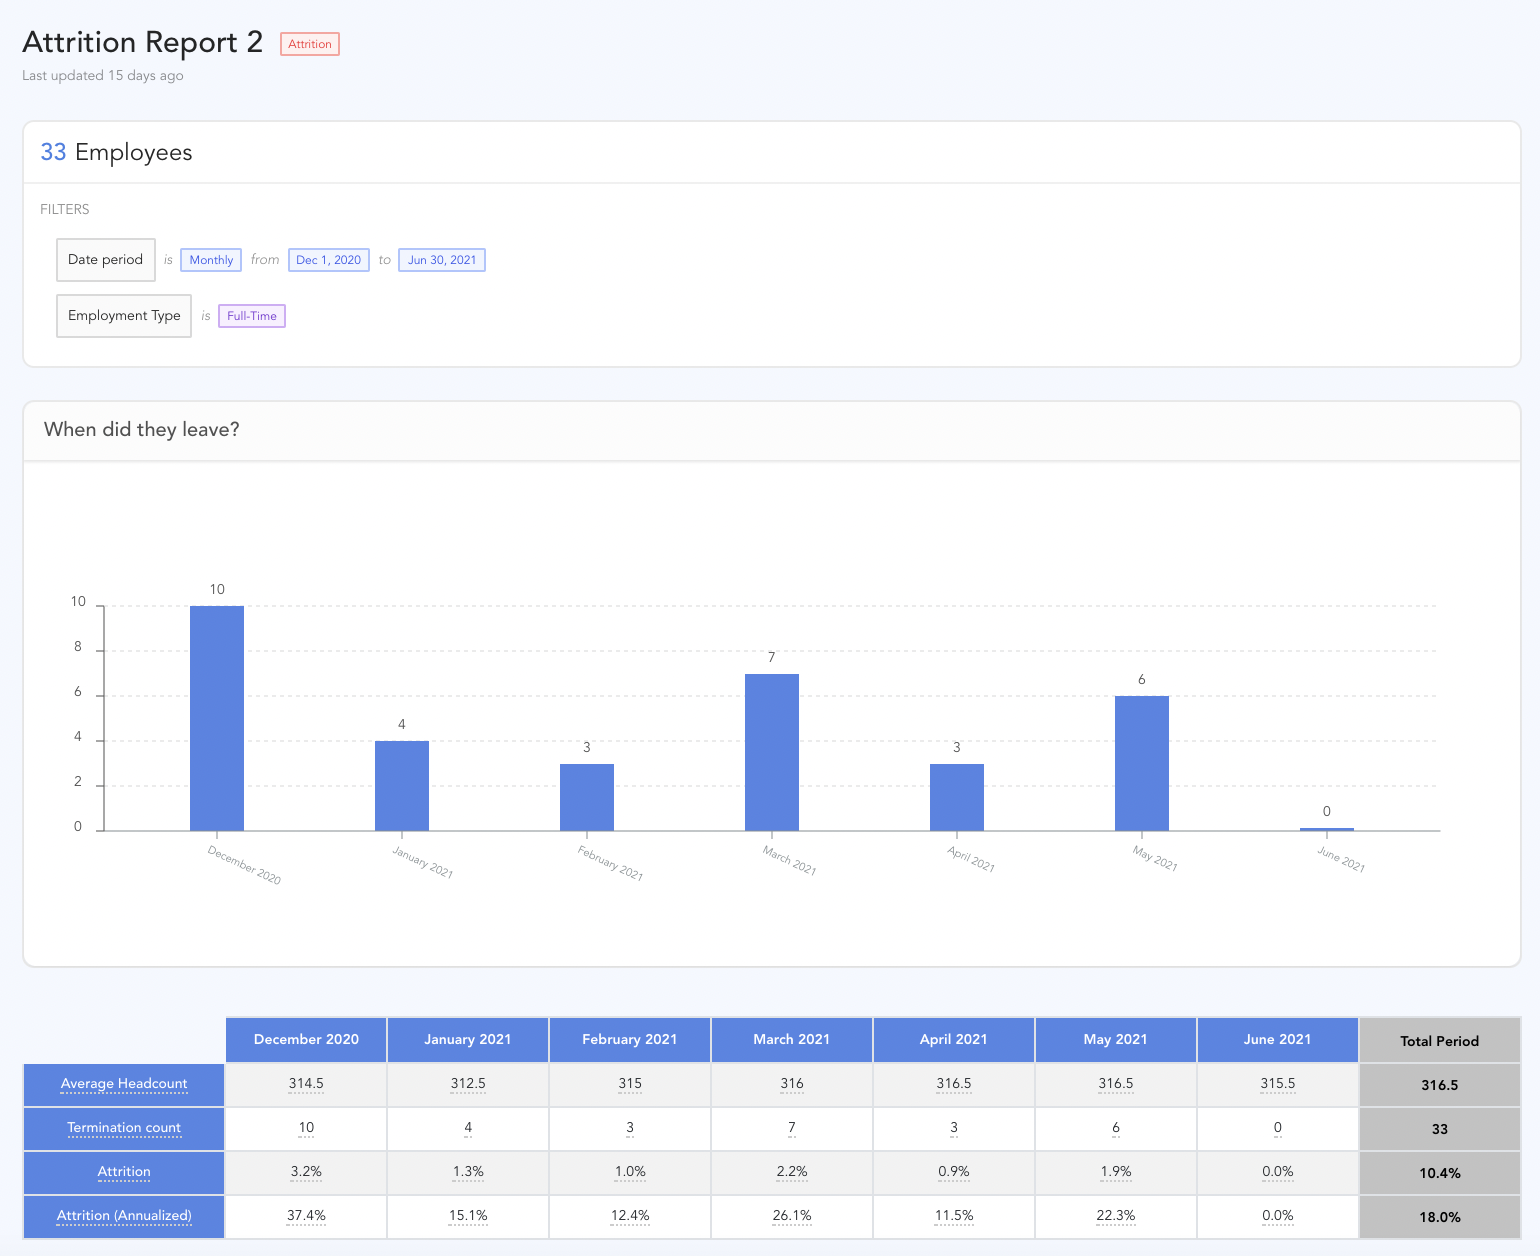
And below is an example of how the report will look to the guest. They will see your criteria and report results, but will not be able to double-click in and drill down further.
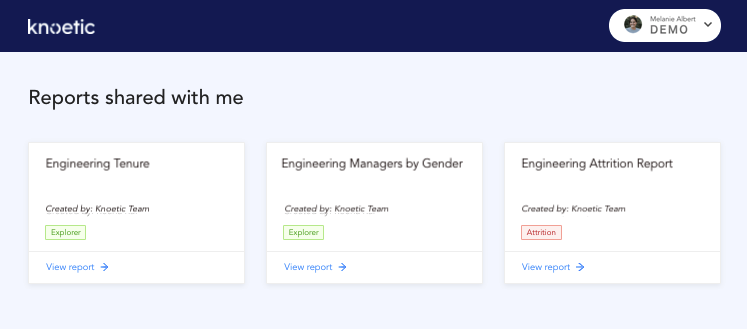
Report dashboard for Guests
Guests will be asked to log into Knoetic, and get a dashboard view of the reports they've been shared on, like this:
Managing Guest user access
Users with full Knoetic access will be able to view and manage what their guests can see within Knoetic.
To remove a guest's access to a specific report, visit the relevant report and click "Share". Click the remove icon highlighted below to revoke their invitation or remove their access.

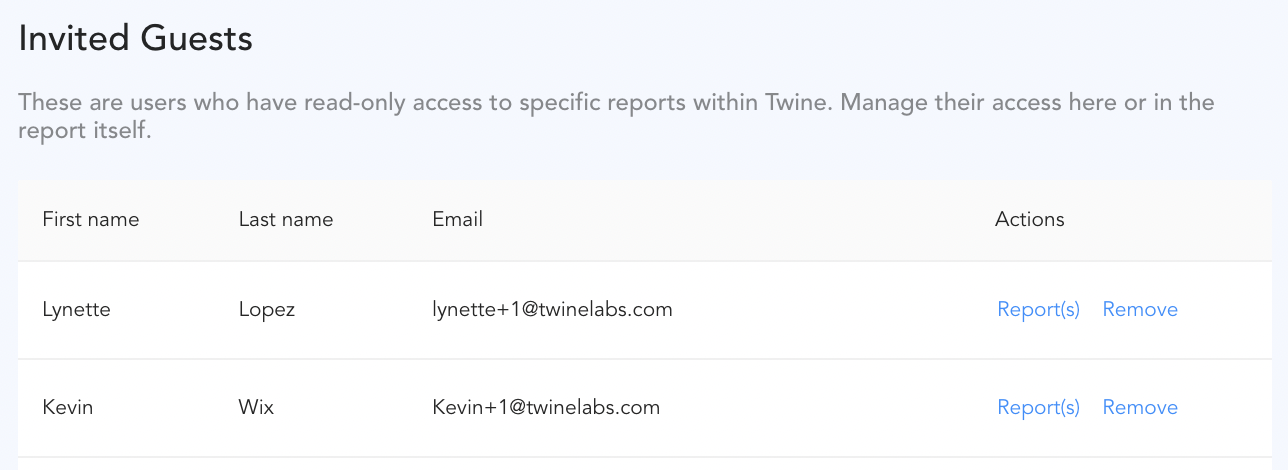
To remove a guest's access, visit Settings > Users. Scroll down to "Invited Guests" where you'll be able to see all guests, view their reports, and remove their access.